Caps For Kitchen Cabinets: Functionality, Aesthetics, and Installation
Kitchen cabinets are a significant investment and a defining feature of any kitchen space. Preserving their condition and enhancing their appearance are crucial for maintaining the overall value of a home. While often overlooked, caps for kitchen cabinets play a vital role in protecting the integrity of the cabinet structure and adding a finished aesthetic touch. This article will delve into the functionality of these caps, the various types available, and the practical aspects of installation.
Caps, also known as end caps, edge banding, or trim, serve multiple purposes for kitchen cabinets. They primarily function as protective barriers, shielding the exposed edges and corners of cabinet materials from damage. Without these caps, the underlying composite wood, particleboard, or plywood is vulnerable to moisture absorption, chipping, peeling, and general wear and tear. This protection extends the lifespan of the cabinets and prevents costly repairs or replacements.
Furthermore, caps improve the overall aesthetic appeal of the cabinetry. Raw edges can appear unfinished and detract from the polished look of a kitchen. Caps provide a clean, seamless transition, concealing the internal structure of the cabinet and creating a more visually pleasing result. They can be matched to the cabinet door style and finish, or intentionally contrasted to add design interest.
The selection of appropriate caps depends on several factors, including the cabinet material, the desired aesthetic, and the level of protection required. Understanding the different types available is crucial for making an informed decision.
Understanding the Functionality of Cabinet Caps
The primary function of cabinet caps is protection. Kitchen environments are often subject to spills, humidity, and temperature fluctuations. Without proper edge protection, these elements can permeate the cabinet material, leading to swelling, warping, and eventual structural failure. Caps create a seal that prevents moisture from penetrating the vulnerable edges of the cabinet boxes and doors.
Beyond moisture protection, caps also safeguard against physical damage. Edges and corners are particularly susceptible to chipping and impact damage from everyday use. A durable cap absorbs the impact, preventing unsightly cosmetic damage and preserving the structural integrity of the cabinet. This is particularly important in high-traffic kitchens or households with children.
Another critical function of cabinet caps is improving the hygiene of the kitchen. Exposed edges can harbor dirt, grime, and bacteria, making them difficult to clean thoroughly. A smooth, sealed cap creates a hygienic surface that is easy to wipe down and sanitize, contributing to a cleaner and healthier kitchen environment.
In addition to these core functions, cabinet caps also play a role in sound dampening. They can help to reduce the noise generated when closing cabinet doors and drawers, contributing to a quieter and more peaceful kitchen.
Types of Kitchen Cabinet Caps: Materials and Styles
The market offers a wide array of materials for kitchen cabinet caps, each with its own set of advantages and disadvantages. Common materials include PVC, wood veneer, solid wood, metal, and melamine. The selection process often involves considering the existing cabinet material, the desired level of durability, and the aesthetic preferences of the homeowner.
PVC (Polyvinyl Chloride) caps are a popular choice due to their affordability, water resistance, and ease of installation. PVC is a durable plastic that effectively seals edges against moisture and withstands daily wear and tear. It is available in a variety of colors and textures, allowing for a seamless match with existing cabinetry. However, PVC may not offer the same level of aesthetic appeal as natural wood options.
Wood veneer caps provide the look of solid wood at a more affordable price point. These caps consist of a thin layer of real wood bonded to a substrate material, such as particleboard or MDF. They offer a natural aesthetic and can be stained or painted to match the existing cabinetry. However, wood veneer is more susceptible to moisture damage than PVC and requires careful maintenance.
Solid wood caps offer the highest level of durability and aesthetic appeal. They are crafted from solid pieces of wood, providing a robust and long-lasting edge protection solution. Solid wood caps can be stained, painted, or varnished to create a custom look that complements the kitchen design. However, solid wood is also the most expensive option and requires regular maintenance to prevent warping and cracking.
Metal caps, often made of aluminum or stainless steel, offer a sleek and modern aesthetic. They are highly durable, resistant to moisture and heat, and easy to clean. Metal caps are often used in contemporary kitchen designs and can add a touch of industrial chic. However, they may not be suitable for traditional or rustic kitchen styles.
Melamine caps consist of a thin layer of melamine resin bonded to a substrate material. They are available in a wide range of colors and patterns, including wood grain finishes. Melamine caps are affordable and easy to clean; however, they are not as durable as PVC or solid wood and are susceptible to chipping and peeling.
Beyond the material, the style of the cap also plays a crucial role in the overall aesthetic. Edge banding is a simple and versatile option, providing a clean and seamless finish. Decorative trim adds a more ornate touch, often featuring profiles such as ogee, cove, or bevel. Corner caps are specifically designed to protect and enhance the appearance of cabinet corners.
Installation Techniques and Best Practices
The installation of kitchen cabinet caps is a crucial step in ensuring their effectiveness and longevity. Proper installation techniques are essential for achieving a seamless and durable finish. While some homeowners may choose to hire a professional installer, others may opt for a DIY approach.
Before beginning the installation process, it is essential to accurately measure the edges and corners of the cabinets. Precise measurements are crucial for ensuring a proper fit and avoiding gaps or overlaps. It is also important to select the appropriate adhesive for the chosen cap material. Contact cement, wood glue, or specialized PVC adhesives are commonly used, depending on the application.
The installation process typically involves cutting the cap material to the required length and applying adhesive to both the cap and the cabinet edge. The cap is then carefully aligned and pressed firmly into place. Clamps or weights can be used to hold the cap in position while the adhesive dries. Excess adhesive should be wiped away immediately to prevent staining or discoloration.
For edge banding, a specialized edge banding trimmer can be used to create a clean and flush finish. This tool trims the excess banding material, leaving a smooth and professional-looking edge. For decorative trim, miter cuts are often required to create seamless corner transitions. A miter saw is essential for achieving accurate and precise miter cuts.
When installing corner caps, it is important to ensure that the corners are clean and free of debris. The caps should be securely attached using adhesive or screws, depending on the type of cap and the cabinet material. Any gaps or imperfections can be filled with wood filler or caulk and then sanded smooth and painted or stained to match the surrounding cabinetry.
Proper surface preparation is crucial for ensuring a strong and durable bond between the cap and the cabinet. The surface should be clean, dry, and free of any loose paint, varnish, or debris. Sanding the surface lightly can also improve adhesion. When working with porous materials such as wood, a primer can be applied to seal the surface and improve the bond between the adhesive and the cabinet.
Maintaining the installed caps is also essential for their long-term performance. Regular cleaning with a damp cloth and mild detergent will help to remove dirt and grime and prevent staining. For wood caps, periodic application of a wood polish or sealant will help to protect the wood from moisture and maintain its natural beauty. Any signs of damage, such as chips or cracks, should be repaired promptly to prevent further deterioration.

10 Types Of Kitchen Cabinet Molding For Your Home

Membrane Cover Kitchen Cabinet Seral Mermer Mobilya

9 Crown Molding Types To Raise The Bar On Your Kitchen Cabinetry Worthington Millwork

5mm Hole Cover Caps Light Oak Blanking Bung Kitchen Bedroom Cabinet Shelf

35mm Hinge Hole Cover Caps For Kitchen Cabinets 10pk

35mm Hinge Hole Cover Caps For Kitchen Cabinets White Grey Brown Cream Beige Oak

Roof Caps For Vent Hoods Everything You Need To Know About Modern Copper Llc

White Cabinet Hole Covers 96 Pcs Sheet Cap Kitchen Cabinets Furniture Eco Friendly Stickers Decorative Com

9 Crown Molding Types To Raise The Bar On Your Kitchen Cabinetry Worthington Millwork

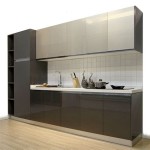
Island End Caps