Painting Kitchen Cupboards White: A Transformation Guide
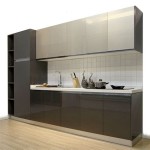
The kitchen often serves as the heart of the home, and its aesthetic appeal significantly impacts the overall feel of the living space. Outdated or dark kitchen cupboards can make the entire kitchen feel drab and unwelcoming. Painting kitchen cupboards white represents a popular and cost-effective method for breathing new life into this central area. The transformation achievable through this project can be dramatic, significantly brightening and modernizing the kitchen's appearance. This article provides a detailed guide, outlining the necessary steps and considerations involved in successfully painting kitchen cupboards white, exploring before and after comparisons, and offering insights into achieving professional-looking results.
Before embarking on this renovation project, careful assessment of existing cupboards is crucial. Determining the material of the cupboards (wood, laminate, or metal) dictates the appropriate primers, paints, and application techniques. A thorough cleaning and preparation process is also essential to ensure proper paint adhesion and a smooth, durable finish. Neglecting these initial steps can lead to paint chipping, peeling, or an uneven appearance, ultimately compromising the project's success.
Key Point 1: Preparation is Paramount: Cleaning, Sanding, and Priming
The success of any paint project, especially one involving kitchen cupboards, hinges upon meticulous preparation. The initial stage involves a deep cleaning to remove grease, grime, and any accumulated residue. A degreasing cleaner specifically designed for kitchen surfaces is recommended. Following the cleaning, a thorough rinsing with clean water and allowing the cupboards to dry completely is vital. This removes any lingering cleaner residue that could interfere with paint adhesion.
Sanding constitutes the next critical step. The purpose of sanding is to create a slightly rough surface, facilitating better paint adhesion. For previously painted or varnished cupboards, a medium-grit sandpaper (around 120-grit) is suitable for lightly scuffing the existing finish. For bare wood cupboards, starting with a coarser grit (around 80-grit) and gradually progressing to a finer grit (around 120-grit) is recommended. It is essential to sand all surfaces, including edges and corners, ensuring an even and consistent texture. After sanding, all dust must be meticulously removed using a vacuum cleaner followed by a tack cloth. Dust particles trapped beneath the paint will result in an uneven and textured finish.
Priming serves as a crucial bridge between the existing surface and the new paint. A high-quality primer creates a uniform surface, blocks stains, and enhances paint adhesion. The appropriate primer depends on the cupboard material. For wood cupboards, an oil-based or latex-based primer is generally suitable. For laminate or metal cupboards, a specialized bonding primer is essential to ensure proper adhesion. Applying the primer in thin, even coats, allowing it to dry completely according to the manufacturer's instructions, and lightly sanding with fine-grit sandpaper (around 220-grit) before applying the paint will contribute to a professional finish.
Choosing the right primer is important to prevent bleed-through of tannin from wood. Certain types of wood, such as oak or cherry, contain tannins that can leach through the paint, causing discoloration. Tannin-blocking primers are specifically formulated to prevent this issue. This is particularly important when painting cupboards white, as any discoloration will be readily apparent.
The surrounding work area should also be adequately protected. Drop cloths should be used to cover floors and countertops, and painter's tape should be applied to protect adjacent surfaces, such as walls and backsplashes. This will prevent paint splatters and ensure clean, crisp lines.
Key Point 2: Selecting the Right Paint and Application Techniques
The choice of paint significantly impacts the durability and aesthetic appeal of the painted kitchen cupboards. For kitchen cupboards, a high-quality enamel paint is generally recommended due to its durability and resistance to scratches, stains, and moisture. Enamel paints are available in both oil-based and water-based (latex) formulations. Water-based enamel paints are often preferred due to their lower VOC (volatile organic compound) content, easier cleanup, and faster drying time. However, oil-based enamel paints tend to provide a harder, more durable finish.
The sheen of the paint also plays a role in both appearance and functionality. Semi-gloss or gloss finishes are typically recommended for kitchen cupboards due to their durability and ease of cleaning. These finishes resist stains and can be easily wiped clean, making them ideal for areas prone to spills and splatters. However, higher gloss levels tend to highlight imperfections in the surface, so careful preparation is even more critical when using these finishes. Satin finishes offer a softer, more subtle sheen and are also a viable option, providing a balance between durability and aesthetics.
Application techniques play a critical role in achieving a smooth, even finish. Using a high-quality brush, roller, or sprayer is recommended. Brushes are ideal for detail work, such as corners and edges. Rollers, particularly foam rollers, are suitable for covering larger surfaces. Sprayers provide the most even and professional-looking finish but require more setup and cleanup. When using a brush or roller, applying thin, even coats and avoiding excessive pressure is essential to prevent brushstrokes or roller marks. Multiple thin coats are preferable to one thick coat, as they dry more evenly and are less prone to runs or drips.
Spraying typically involves using a paint sprayer such as an airless sprayer. These machines can offer a fast, even application but require more experience to operate effectively. They also require safety equipment such as respirators. The paint must also be thinned down sufficiently to flow properly through the sprayer. Sprayers are commonly used by professionals as the application has a very smooth factory like finish.
Regardless of the application method, allowing each coat of paint to dry completely according to the manufacturer's instructions before applying the next coat is crucial. Lightly sanding between coats with fine-grit sandpaper (around 320-grit) can help to remove any imperfections and create a smoother surface for the next coat. Dust should be removed after sanding before applying paint.
Key Point 3: Hardware Considerations and Reassembly
Before painting, all hardware, including knobs, pulls, and hinges, should be removed from the cupboards. This allows for a more thorough paint job and prevents paint from getting on the hardware. If the hardware is outdated or damaged, consider replacing it with new hardware that complements the updated kitchen aesthetic. New hardware can significantly enhance the overall look of the painted cupboards.
If the existing hardware is in good condition, consider cleaning and polishing it before reattaching it to the painted cupboards. Metal hardware can be cleaned with a metal polish, while wooden hardware can be cleaned with a mild soap and water solution. This will help to restore the hardware's original luster and ensure that it looks its best against the newly painted cupboards.
When reattaching the hardware, ensure that it is properly aligned and securely fastened. Using a drill with the appropriate screwdriver bit can help to prevent stripping the screws or damaging the cupboards. If the screw holes are stripped, consider using wood filler to repair them before reattaching the hardware. This will ensure a secure and long-lasting attachment.
Consider using self-closing hinges for an added touch of convenience and functionality. Self-closing hinges automatically close the cupboard doors, preventing them from slamming shut. This can help to reduce noise and prevent damage to the cupboards. Many self-closing hinges are also adjustable, allowing you to fine-tune the alignment of the cupboard doors.
The order of reassembly can also impact the final result. It is generally recommended to reattach the hinges to the cupboard doors first, followed by the knobs or pulls. This will allow you to easily adjust the alignment of the doors before attaching the hardware. Ensure that all screws are tightened securely before considering the job complete.
A well-executed paint job on kitchen cupboards can drastically transform the look and feel of the kitchen. The transition from dark, outdated cupboards to bright, white cupboards offers a clean, modern, and spacious aesthetic. This renovation can significantly increase the perceived value of the home and improve the overall enjoyment of the kitchen space, contributing to a more welcoming and functional living environment. The process, while requiring time and attention to detail, represents a worthwhile investment in home improvement.

Our Painted Cabinets Five Years Later Nina Hendrick Home

Update On Our Diy White Painted Kitchen Cabinets 2 Years Later

Painted Cabinets Nashville Tn Before And After Photos Brown Kitchen Painting White

Here S How To Spray Paint Kitchen Cabinets Old New Before And After

Painted Cabinets Nashville Tn Before And After Photos

Pa Wedding Photographer Diy Painted Kitchen Cabinets Before After

White Painted Kitchen Cabinet Reveal With Before And After Photos 365 Days Of Slow Cooking Pressure

Ask Maria Help My White Painted Kitchen Cabinets Look Bad Advice For Homeowners

Painted Kitchen Cabinet Ideas And Makeover Reveal The Polka Dot Chair

How To Paint Kitchen Cabinets White In 5 Days For 150 The Nutritionist Reviews